Cibolo, TX · Garage Floor Coating
Polyaspartic Garage Floor Coating in Cibolo
A polyaspartic flake coating turns a stained, dusty garage slab into a hard, glossy floor that cleans with a mop — and in most two-car garages around Cibolo it goes down in a single day. Here is how a proper system is installed and what decides the price.
01 — What this covers
The work itself
- Full-broadcast flake floors in 1-, 2- and 3-car garages
- Diamond grinding and surface preparation
- Crack, spall and control-joint repair before coating
- Removal of failed DIY epoxy or old paint
- Polyaspartic and polyurea base coats
- UV-stable clear polyaspartic topcoat
- Anti-slip additive on request
- Stem walls and steps coated to match
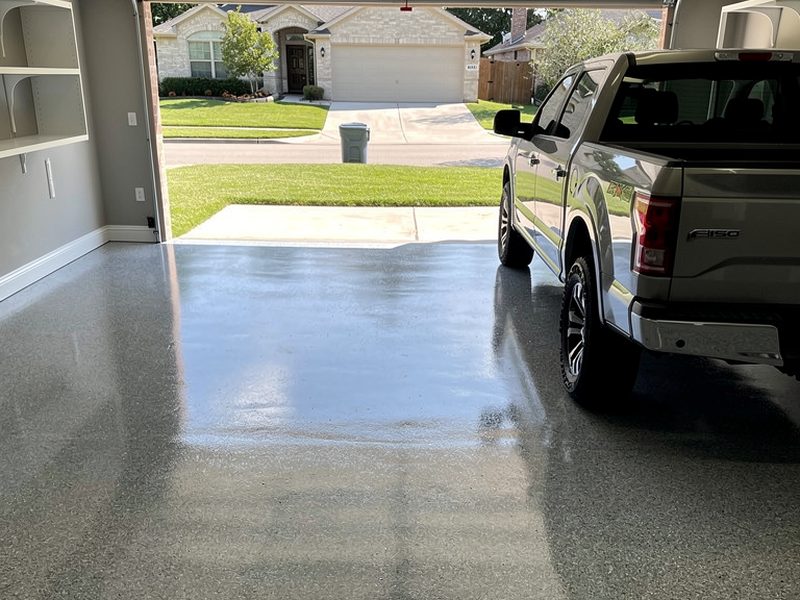
Illustrative image of the finish — not a photograph of a specific local project.
02 — Detail
Why polyaspartic instead of a regular epoxy kit
The coatings sold in a box at the hardware store are water-based epoxies a few mils thick. They look good for a season. Then the first hot summer arrives, a car comes in off the highway, and the tires lift the coating where they park — the classic peeling patches you see in garages all over the San Antonio area.
A polyaspartic system is a different category of product. It is a type of polyurea: it cures fast, it bonds hard to properly prepared concrete, and the clear topcoat does not yellow in sunlight the way many epoxies do. That last point matters in a Texas garage where the door is open half the day and the late sun reaches well inside.
Many professional systems use an epoxy or polyurea base coat for its bonding and build, then a polyaspartic topcoat for wear and UV resistance. What you want to avoid is a single thin coat of anything. Ask an installer how many coats go down and what each one is; a clear answer is a good sign.
03 — Detail
Preparation is ninety percent of the result
Concrete straight from the builder is smooth and closed on top, and most garages also carry years of oil, tire residue and sealer. A coating laid over that has nothing to hold on to. The industry answer is diamond grinding: a walk-behind grinder with diamond tooling takes the top skin off the slab, opens the pores and leaves a profile the base coat can bite into. It is loud, it is dusty without proper vacuums, and it is the single step that most separates a floor that lasts from one that peels.
Acid etching — the method in most DIY kits — is cheaper and much less consistent. It can leave residue, it does little to oil-soaked spots, and it cannot remove an old coating. If an estimate is noticeably lower than others, ask whether the floor will be ground or etched.
After grinding comes repair. Cracks are opened up and filled with a rigid or semi-rigid filler, pits and spalls are patched, and the edges along the walls are hand-ground where the big machine cannot reach. Only then does any coating go down.
04 — Detail
Choosing a flake blend
The colored chips are vinyl flakes broadcast into the wet base coat until it is fully covered, then the loose excess is scraped and vacuumed off before the clear topcoat seals them in. A full broadcast gives the familiar granite-like look and a slightly textured, grippy surface.
Mid-tone greys, tans and mixed blends are the most practical choice for a working garage: they hide dust, tire marks and the red clay that inevitably gets tracked in during a wet week. Very dark or very light blends look striking in photographs and show everything in real life.
Flake size changes the look as well. Larger flakes read as more decorative from a distance; smaller ones give a tighter, more uniform pattern. If you can, look at a physical sample board in your own garage light before deciding — colors look different under fluorescent tubes than in a showroom.
05 — Detail
What the slab under your garage is doing
Cibolo and most of the surrounding communities are built on Blackland Prairie clay, a soil that swells when wet and shrinks when dry. Slab foundations here move, slowly, with the seasons, and garage slabs show it first: hairline cracks from the inside corners, cracks along the saw-cut control joints, and sometimes a slight lip where two sections have moved differently.
A coating cannot stop that movement, and nobody honest will tell you it can. What proper crack repair does is keep minor, stable cracks from showing straight through the new floor. Control joints are a judgment call: some homeowners prefer them filled and coated over for a seamless look, others prefer them left visible so any future movement follows the joint rather than creating a new line. A good installer will explain the trade-off rather than just picking one.
Moisture is the other check. A slab that pushes a lot of moisture vapor up from below can cause adhesion problems, so many installers test before coating, especially in older homes or garages that were once flooded.
06 — Detail
Living with the floor afterwards
Day to day, a polyaspartic floor needs a dust mop or a leaf blower and the occasional wash with water and a mild cleaner. Oil drips and spilled fluids wipe off instead of soaking in. Avoid harsh solvents and avoid dragging sharp metal across the surface — a coating is tough, not indestructible.
Hot-tire pickup, the failure that ruins so many DIY floors, is far less of a concern with a properly ground and coated system. Wet floors can be slippery, especially with a smooth finish, which is why a full flake broadcast or an anti-slip additive in the topcoat is worth discussing if you walk through the garage in wet shoes.
Ask what the warranty covers before you sign. A useful warranty addresses peeling and delamination, not only color fading, and says clearly what is excluded.
How we work
Step by step
- 01
You call or send the garage size, the city and a couple of photos of the floor
- 02
An installer looks at the slab, checks moisture and existing coatings, and gives you a written estimate
- 03
On install day the floor is diamond-ground, vacuumed, and every crack and pit is filled
- 04
Base coat, full flake broadcast, scrape and vacuum, then a clear polyaspartic topcoat
- 05
Walk on it that evening; park on it once the installer gives the go-ahead, usually after about 24 hours
What it costs
Most two-car garages in this area land somewhere in the low-to-mid thousands of dollars. The number moves with square footage, the condition of the concrete, and whether an old coating has to come off first — which is why you get a written estimate after someone has seen the floor, not before.
Questions
Garage Floor Coating — asked and answered
How long does a garage floor coating take?
A typical two-car garage with a polyaspartic system is usually finished in one day. Light foot traffic is normally fine that evening, and most installers ask you to wait about 24 hours before parking. Larger garages, heavy repairs or removing an old coating can add a day.
Will a coating fix the cracks in my garage floor?
Cracks are repaired and filled before coating so they do not show through, but a coating cannot stop the slab from moving. On the expansive clay around Cibolo, new hairline cracks can still appear over the years; a good repair keeps existing ones from telegraphing.
Is polyaspartic better than epoxy?
For a garage in Texas heat, a polyaspartic topcoat is generally the better wearing surface: it cures fast, resists UV yellowing and holds up to hot tires. Many professional systems combine an epoxy or polyurea base with a polyaspartic topcoat.
Can you coat over my old epoxy?
Not if it is peeling. A failing coating has to be ground off completely, otherwise the new floor is only as strong as the old bond underneath. Removal adds time and cost, so mention it when you ask for an estimate.
Also
Other coating services
Epoxy Garage Floors
Epoxy is still the word most people use for any coated garage floor, and professionally installed epoxy has a …
Metallic Epoxy Floors
Metallic epoxy uses pigments that swirl and reflect light to create a marbled, almost liquid look. It is the m…
Concrete Patio Coating
Outdoor concrete has a harder life than a garage floor: full sun, rain, temperature swings and bare feet. A pa…
Driveway Coating & Sealing
A driveway carries the weight of every vehicle, bakes in full sun and drains the rain off your lot. The right …
Pool Deck Coating
A pool deck has to be cool on bare feet, grip when wet and stand up to chlorine, sun and constant water. When …
Stained & Decorative Concrete
Not every concrete floor needs a thick coating. Stains, dyes and thin decorative overlays can transform plain …
Commercial & Shop Floors
Small warehouses, auto shops, retail floors, gyms and barns all need concrete that is easy to clean, resists w…
Service area